Main » 2010»July»6 » Create beautiful golden skin effect using three different ways
Tweet
10:53 AM
Create beautiful golden skin effect using three different ways
Today i will tell you three new ways to make a beautiful golden skin
effect using 3 different color modes: RGB, Lab and CMYK. By picking up new color we can
set the tone we want. You should choose the good quality image to
get better result. I use this stock:
1. RGB :
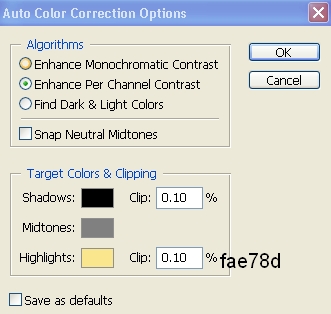
1a. Duplicate your pic. Sharpen, soften skin it if need. Press Ctrl+L to adjust levl. Choose Options to set new color:
Set midtones and shadows as defaut, and change highlight with fae78d .
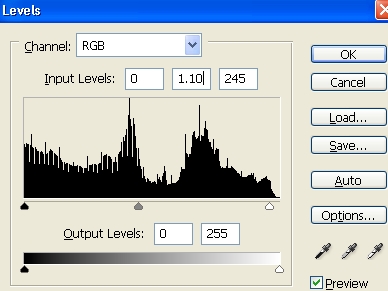
After clicking ok, change input level like this:
Click No when you are asked to set new color as default.
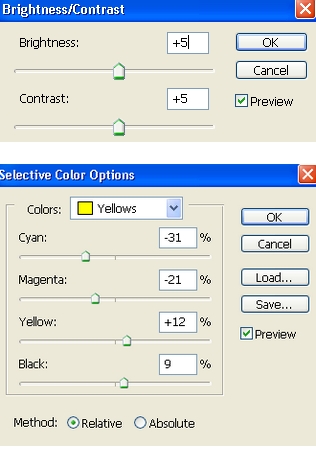
1b. Create new brightness/contrast and Selective color layer:
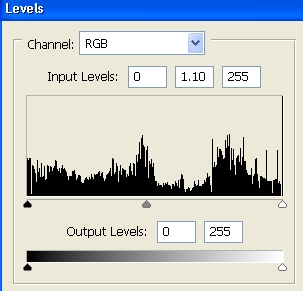
1c. New level layer:
We have final effect:
2. Lab color:
2a. Duplicate your pic. Change the mode to Lab color without flattening
layers.
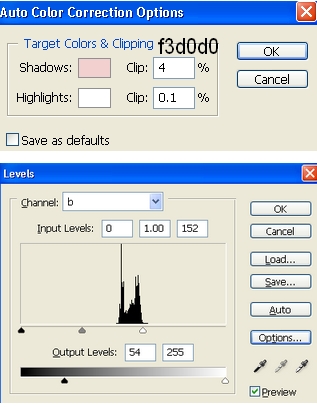
Press Ctr+L to adjust levels on b channel. Choose options, and set
f3d0d0 for shadows:
Change the mode to RGB . We have:
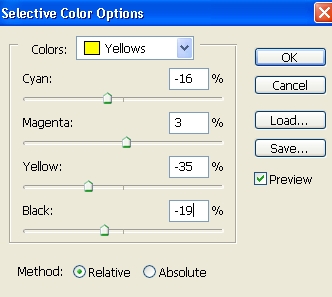
2b. Create a new selective color layer, adjust on Yellows channel:
I really like this effect but if you want, you can adjust the tone.
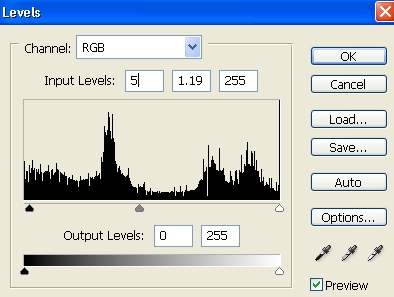
Levels is correct if your pic is still dark or too strong tone:
Result:
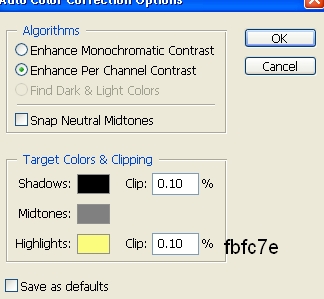
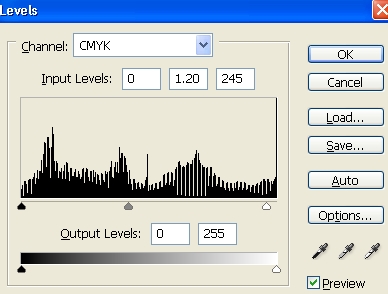
3. CMYK : 3a. Duplicate the base. Change the mode to CMYK. Press Ctrl+L to
adjust levels: Choose Options and replace color like that:
Press No when you are asked to set such color to default.
You should change the mode to RGB before saving your image otherwise your pic tone will look darker after saving in CMYK.
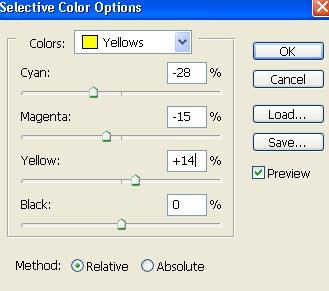
3b. New Selective color layer :
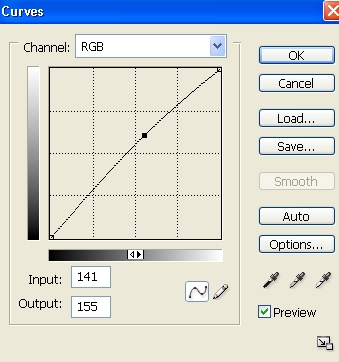
3c. Now you can adjust the tone and lightness by Levels or Curves. I use
Curves:
We're done:
Final effects from different modes:
You can find a similar effect in one of my previous tutorials:
Sweet orange tone
ABOUT ME: I'm Jenny and i live in Hanoi, Vietnam. If you like what i write or want to keep in touch with me, you can subscribe to My blog, email me
or like My Facebook page to keep updates of my latest works.
Please ask before you want to post or translate my tutorials on other sites. I hardly decline if you ask nicely. Thank you :).
Thankx 4 sharing retouching tutorial with us nd i love ur effect..Actually i m very weak in retouching but not in making wallpapers,u can check my wallpapers on ma facebook id.thank u very much
I;ve looked at your FB, im really impressed by your art work. Would u mind if i add u to my FB friend list so that i can keep getting news from u? btw thank you very much for kind and nice footprints, i do appreciate it. Greetings to Pakistan
Good night. I have a blog about Photoshop and I would ask your permission to publish your tutorials version translated into Portuguese. Of course the end of each post, I'll include a link to your original post. I await contact.
Yes, you can translate my tutorials into your languages with credit links back to my website . Thank you for regarding and pls inform me when they are added on your site I think maybe its the day start in Brazil, so have a fresh morning
i am new born in the field of designing. while surfing the net i come through u r site and i am using the tips u provide for the tutorials. And main thing u don't feel bored to reply every questions.So good job and keep on doing.
hehe i like to hear all feedbacks to keep me inspired and improved . Thanks for your kind words and footprint here, im so glad to know what i've shared useful. I wish you to gain your skill fastly and properly